sostituzione cavi RCA Technics 1200
video dal canale youtube di Russtafari
cambio del cavetto RCA del Technics SL-1200 MK2
——————————————–
guida in lingua inglese per la sostituzione del cavo RCA del Technics SL-1200 MK2
(fonte: http://www.djdepot.com/changing_rca_cables_technics_1200.html)
Replacing/Changing your RCA cables on the Technics 1200
by Chris Robin
This is a good fix for people who have three turntables and have problems getting the RCA cables to reach around a 19" mixer. Please read each step in whole before following it, sometimes learning where you are going before you go, can help you get there easier.
Tools
#2 Phillips Screwdriver, Precision Screwdriver set, Soldering Iron, Solder wick, Solder.
Step One:
First remove the platter, secure the tonearm, and remove the 45 plug from your turntable. Always unplug your turntable before removing the platter. Flip it over and remove the 20 sum screws from the underside and remove the foot pads. The foot pads come off by turning them counter clockwise. Once they are removed you will notice there is another screw under each one. Remove that as well. Carefully pull the rubber base from the bottom of the turntable.
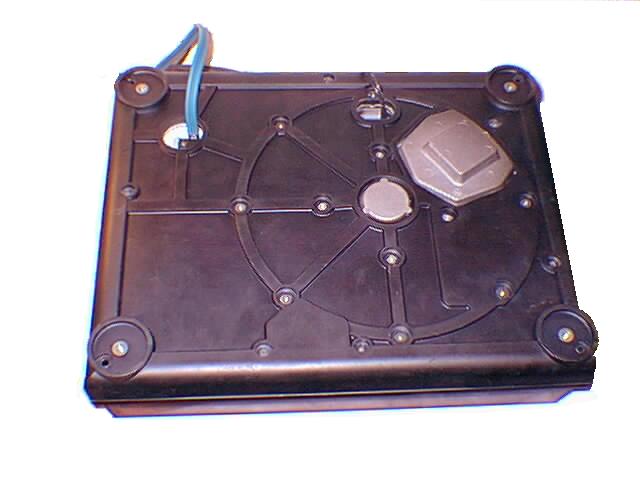
Step Two:
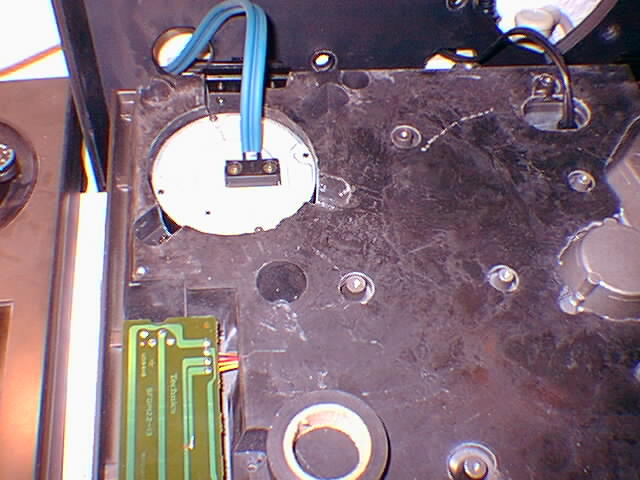
Once you have the rubber base removed you can shift your attention to the top left corner of the turntable. You can see where the current RCA cables come out of the bottom. You need to remove the plastic retaining clip (The RCA cable is coming directly out from it) and the metal cover. The retaining clip is fastened down by two screws. Remove the screws and you will notice that the cable is crimped by the retaining clip as well.
*PLEASE TAKE NOTE ON HOW THE CLIP IS CRIMPING THE RCA CABLE SINCE YOU WILL HAVE TO PUT IT BACK LATER**
Using a precision screwdriver to unhook the clips, unclip the retainer. Now remove the two screws holding the circular metal cover and gently lift. Please do not pull anything during this process as the RCA cable is attached directly to a circuit board.
Step Three:
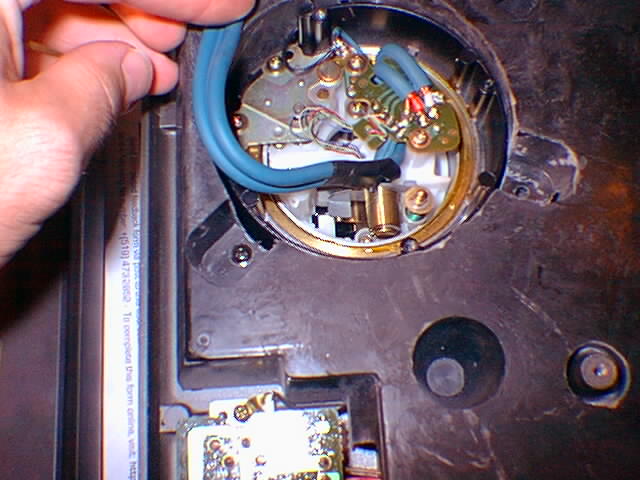
Okay, now that we have everything open you can see the underside of the tonearm assembly. The RCA cable winds around and under the circuit board to which it is soldered and is held down by a tie. Using something like mini wire cutters, clip the tie. Now, You will need to remove the RCA cable from the circuit board. Take note of where the different colored wires are soldered. I beleive they are color coded as Red = Right, and White = Left, but you still need to remember where they are soldered onto the board. What I did to eliminate confusion, is I first did one side, then the other. Anyways, either way, to remove the RCA cable I recommend first removing the solder using a solder wick, or if one is not handy, clip the RCA cable off first with wire cutters, then using Needlenose pliers, heat up the solder and remove the excess wire. Be careful not to pull too hard (say if the solder is not completely heated up) as you will pull the connection pads from the circuit board which would be really BAD! In any case, if you heat the solder up and apply constant pressure the wires will lift quite easily.
Replacing the Ground wire??
Replacing the Ground wire is an easy process. The ground for the tonearm is attached to the circuits boards ground via a small black wire. You will notice that your external ground wire is also attached to this same clip that is screwed into the circuit board. Simply unsolder the old wire and attach a new (hopefully longer) wire in its place. Just make sure that you reattach the tonearms ground (comes out from the inside of the tonearm assembly)
Step Four:
Hopefully you now have either one or both RCA channels removed from the circuit board. First wrap the new cable through the metal cover and around the underside of the circuit board before you solder it on. Now all you need to do is solder the new cable in its place, keeping in mind which channel was soldered in which location. If you forget you can see from the picture above where they go. Solder the new RCA cable back onto the circuit board. Then, using either a garbage tie or another plastic tie, re-connect the RCA cable to the circuit board as it was when you first found it. This is important as it keeps the cable from pulled directly on its solder joints. The last part is kinda tricky if your new RCA cable is thicker than the old one. Fasten down the metal cover. Now, you need to crimp the RCA cable with the plastic retaining clip. This is almost impossible if the RCA cable is really thick, so what you can do is do not bother to crimp it first. If the cable is thick enough, it will be held tightly enough by the retaining clip being screwed down (This is where making sure your RCA cable is tied down inside to the circuit board becomes important). If the RCA cable is still loose after the clip is screwed down, then it means you can probably crimp it, so unscrew it and keep trying. It took me a few minutes to get it but it did go finally.
Step Five:
Just put the rubber base back on, replace the foot pads, and flip it back over. Plug your turntable back in.